


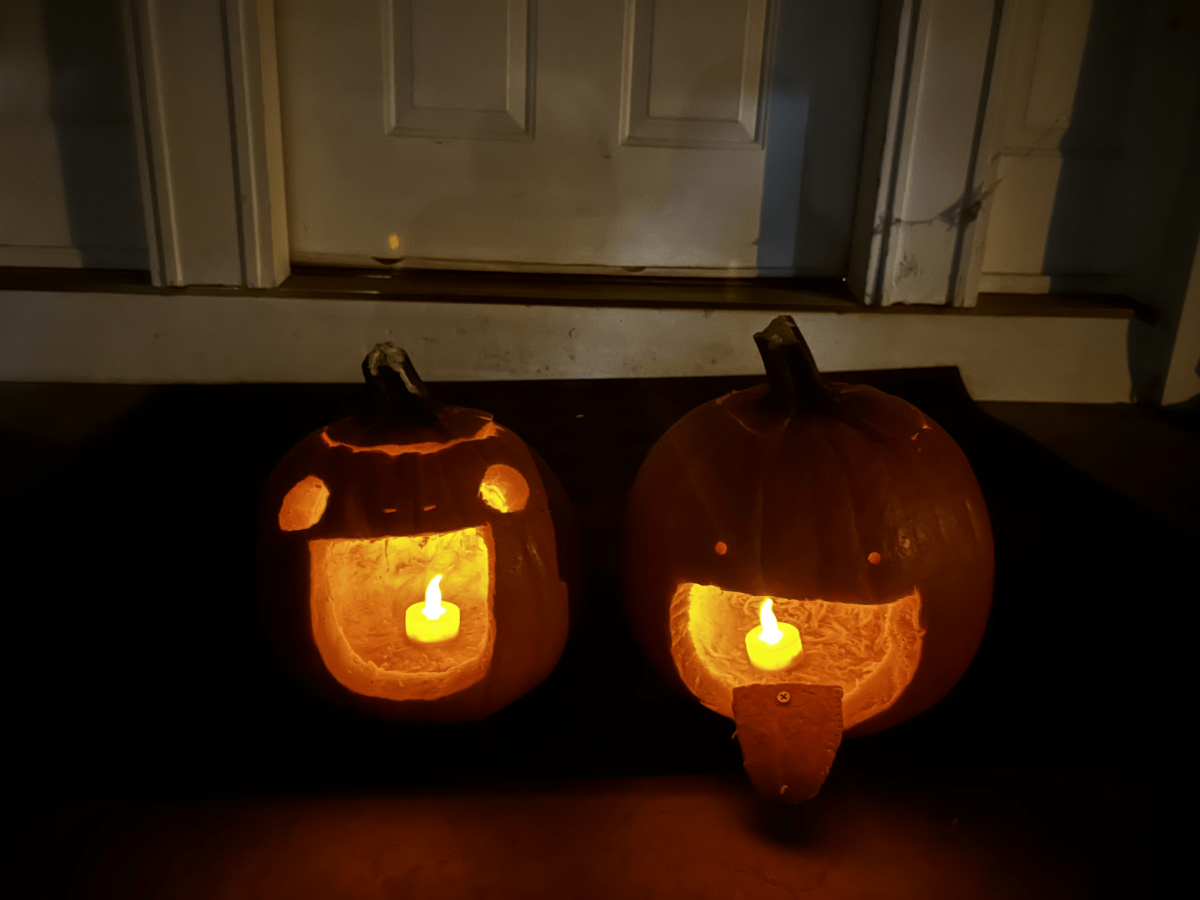
Halloween is right around the corner, which means it’s the perfect time to start carving jack-o’-lanterns. Whether you are going for a spooky face or a silly design, pumpkin carving is a tradition that’s both fun and creative. “It’s something I look forward to every year,” said freshman Jinnie Lee, “It reminds me of the start of fall.” Here is a step by step guide to carving jack-o’-lanterns.
Step 1: Find a pumpkin that’s smooth. A flat bottom will help your pumpkin sit steady while you carve. Make sure to think of a pattern before buying the pumpkin, since certain pumpkins work better for certain designs.
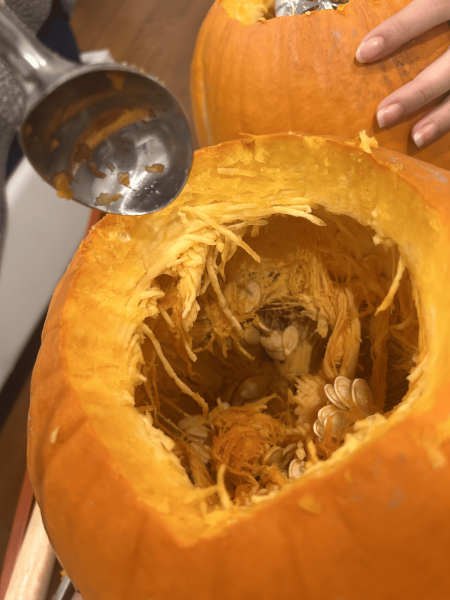
Step 2: You will need a sharp knife, a large spoon, and gloves if you don’t want to get your hands dirty.
Step 3: Carve a lid around the stem and set it aside. Scoop out the guts with a large spoon or with your hands. Don’t throw these away yet as they can be used for recipes.
Step 4: Use a marker to sketch your design before carving. This will help with more precise edges. If you are out of ideas, you can find inspiration from Pinterest or specific tutorials on Youtube.
Step 5: Use your knife and carve along your drawing. Make sure to take your time and keep the sharp part of the knife away from your hands.
Step 6: Place a small candle or any source of light to give life to your jack-o’-lantern. You can also use LED lights, which are safer and last longer than candles.
Tips:
With your leftover seeds, rinse them in a colander and pat them dry. Drizzle some oil on them and add seasonings, such as salt, cinnamon, sugar, or chili powder. Roast them at 350 degrees Fahrenheit in the oven for 15-20 minutes. You now have a crunchy snack.
With your leftover pumpkin flesh, blend it to make a simple puree. This could be added to recipes such as pumpkin pie, pumpkin bread, muffins, etc. You can also feed it to your dog or cat in moderation.
To keep your pumpkin from rotting too quickly, rub petroleum jelly along the cut edges or leave it in the fridge.